Trading Strategies
What Is Mean Reversion (And How to Trade It)
Mean reversion explained for beginners: what it is, why it works, the indicators traders use, and a simple rule-based strategy with stops.
14 min readA gold trading strategy only works if you understand what you are actually trading and what pushes the price around. Before you put on a single setup, get this part right: XAUUSD is the symbol for one troy ounce of gold priced in US dollars. The "XAU" is the metal, the "USD" is the currency you pay in. When you trade gold in forex, you are never taking delivery of bullion. You are trading the price of an ounce as a CFD, going long if you expect the price to rise and short if you expect it to fall. If you are new to the symbol itself, start with our full XAUUSD explainer and come back here for the setups.
Because gold is quoted against the dollar, every XAUUSD move is really two markets at once: what is happening to gold itself, and what is happening to the dollar. That is why a strong dollar can drag gold down even on a day when nothing about gold has changed. Keep that "gold vs USD" relationship in your head on every trade.
Four things move gold more than anything else. Learn these and most of gold's daily behaviour stops looking random.
Gold pays no yield. It sits there. So when real rates (interest rates after inflation) rise, holding gold costs you the yield you could have earned elsewhere, and gold tends to fall. When real rates drop, that opportunity cost shrinks and gold tends to rise. Watch US Treasury yields and the rate-decision calendar. Falling real yields are a tailwind for XAUUSD; rising real yields are a headwind.
Gold is priced in dollars, so the dollar's strength is mechanically part of the price. When the Dollar Index (DXY) climbs, gold usually leans lower; when DXY weakens, gold usually catches a bid. They do not move in lockstep tick for tick, but the inverse relationship is reliable enough that checking DXY before a gold trade is non-negotiable.
Central banks are large, steady buyers of physical gold for their reserves. That structural demand sits underneath the market and tends to put a floor under prices over longer horizons. You will not trade off a single central bank purchase, but the trend in official-sector buying tells you which side of the market has long-term support. The World Gold Council's reserve data tracks this official-sector buying.
Gold is treated as a safe haven asset. When markets get scared (geopolitical shocks, banking stress, sharp equity sell-offs), money often rotates into gold and the price spikes. This is real, but it is not a rule you can lean on blindly. The safe haven bid is inconsistent: there are risk-off days when a surging dollar or rising yields overwhelm it and gold falls anyway. Treat safe haven flows as a driver that can accelerate a move, not a guarantee that gold rises every time headlines turn ugly.
Put together, these four drivers explain most of what XAUUSD does. A clean trend usually lines up with them (for example, falling real yields plus a weakening dollar). The setups below give you exact entry, stop and target rules to trade that behaviour, but the edge starts here: you are trading an ounce of gold against the dollar, pushed mainly by real rates, DXY, central bank demand and risk sentiment.
Gold is a fast, volatile instrument. Larger ranges mean larger swings in both directions, so the position sizing math later in this guide matters as much as the entries. CFDs on gold carry a real risk of loss, and these strategies are educational, not a promise of returns.
Before you take a single XAUUSD setup, you need to know exactly what each price move is worth in your account. Gold moves fast, and if you size a trade by feel you will either risk far more than you planned or far less than the setup deserves. This section sets the convention every example in this guide uses. Memorise it and the rest of the strategies become simple arithmetic.
XAUUSD is quoted to two decimal places, for example 4018.50. There is a lot of loose language in gold trading content, where one writer says "pips," another says "points," and a third says "ticks," often meaning different things. We avoid that. In this guide there is one unit and one only.
For the whole article: 1 pip = 1 point = a $0.10 move in the gold price, on a standard 1.00 lot.
That gives you a clean ladder:
So whenever a later strategy says "stop 50 pips below entry," it means $5.00 below your entry price. When it says "target 150 pips," it means $15.00 of price movement. There is no second definition hiding anywhere in this guide. Pips, points and $0.10 are the same thing throughout. If the pip concept itself is shaky, our guide to what a pip is walks through it from scratch.
Your pip value depends only on your lot size, because XAUUSD is priced in US dollars.
| Lot size | Gold units | Value of 1 pip ($0.10 move) |
|---|---|---|
| 1.00 (standard) | 100 oz | $10.00 |
| 0.10 (mini) | 10 oz | $1.00 |
| 0.01 (micro) | 1 oz | $0.10 |
Read it straight down. On a standard 1.00 lot, every pip is worth $10. On a 0.10 lot, every pip is worth $1. On a 0.01 lot, every pip is worth 10 cents. That scales linearly, so a 0.25 lot is $2.50 per pip, a 0.50 lot is $5.00 per pip, and so on.
This is the one piece of math that ties every setup together. You decide how much money you are willing to lose on the trade, you measure your stop distance in pips, and the lot size falls out of it.
Lot size = (account risk in dollars) / (stop distance in pips x pip value per 0.01 lot)
Worked example. Say your account is $2,000 and you cap risk at 1% per trade, so you are risking $20. You take a setup with entry at 4018.50 and a stop at 4013.50. That stop distance is $5.00 in price, which is 50 pips on our convention.
Check it: 0.04 lots is $0.40 per pip, and 50 pips x $0.40 = $20. That matches your risk exactly. Run that same calculation before every trade and your position size is never a guess.
LHFX offers leverage up to 1:500 on gold (XAUUSD). Leverage decides the margin you must post to open a position, not how much you can lose. At 1:500, the margin to control a position is a small fraction of its notional value, which frees up capital, but your profit and loss is still driven entirely by the pip value and pip move shown above.
This matters because high leverage tempts traders to size up. Do not. The lot size formula above already sets your risk. Leverage just determines how much margin sits behind that position. A 0.04 lot risks $20 whether you are on 1:100 or 1:500. Use leverage for capital efficiency, never as a reason to widen your size.
Two costs apply to every gold trade and both eat into the pip math above. LHFX runs raw spreads from tight levels with $3 per side commission, so a round turn on a standard 1.00 lot is $6 in commission. Factor that into your targets. If a scalping setup aims for 10 pips ($10 on a 1.00 lot) and you pay $6 round turn, more than half the gross move is gone before you book anything, which is exactly why the scalping rules later in this guide demand a minimum reward that clears costs by a wide margin. The minimum deposit to fund an account and start sizing real trades is $10.
Trading XAUUSD with CFDs carries a real risk of loss. The setups below are rule-based and educational, not a promise of returns. Size every trade with the formula above so a losing streak never threatens your account, then read on for the four setups.
Gold moves hardest when the London and New York sessions overlap. That window, roughly 14:00 to 17:00 SAST, is when the most volume hits XAUUSD and the day's real direction usually shows up. The breakout setup trades that energy: you mark the tight range gold builds before the overlap, then trade the first clean break out of it.
A pip in XAUUSD is $0.10 of price movement, so a move from 4000.00 to 4000.10 is one pip. Every level below is measured in pips on that same scale.
Define the range. Take the high and low of the two hours before the New York open. That box is your reference range. The tighter the box, the cleaner the signal, because a narrow pre-overlap range means buyers and sellers are coiled and waiting.
Entry. Buy on a candle that closes above the range high. Sell on a candle that closes below the range low. Wait for the close. An intrabar spike that pokes through and snaps back is a trap, not a breakout.
Stop. Place the stop on the opposite side of the range. If you buy the break above the high, your stop sits just below the range low. That way a failed breakout takes you out fast instead of bleeding.
Target. Aim for 1.5 times your risk as a baseline. If your stop is 80 pips away, your first target is 120 pips of profit. Move the stop to breakeven once price travels one times your risk, so a reversal after that point costs you nothing.
Gold builds a range between 4000.00 and 4010.00 in the two hours before the New York open. A candle then closes at 4011.50, above the range high. You buy at 4011.50.
Your stop goes below the range low at 4003.50, which is 80 pips of risk. At a 1.5R target you book profit at 4023.50, which is 120 pips.
On 1.00 lot, a pip in XAUUSD is worth $10, so 80 pips of risk is $800 and the 120-pip target is $1,200. Size your lots so that 80-pip stop is a loss you are willing to take, never a number that wipes a meaningful chunk of the account. Breakouts fail often, and the only thing that keeps you in the game is a stop you actually respect.
This setup needs participation. It performs best on days with a scheduled catalyst inside or just before the overlap, such as a US data release or a central bank headline. On a quiet, news-light afternoon, the range break is more likely to be a false move that drifts back inside, so either stand aside or demand a wider, more decisive close before you commit.
Gold trends hard once it gets going, but it rarely moves in a straight line. After a strong push it pulls back, shakes out late entries, then continues. This setup waits for that pullback instead of chasing the breakout. You buy strength on a dip and sell weakness on a bounce, using a moving average as your reference for where the trend is likely to resume.
The tool is the 20-period exponential moving average (EMA) on the 1-hour XAUUSD chart. In an uptrend, price stays above the 20 EMA and keeps coming back to test it. In a downtrend, price stays below and rallies into it. The EMA is not magic. It is a moving reference for the average price over the last 20 hours, and in a trending market that average tends to act as support or resistance.
For a long (uptrend continuation):
For a short (downtrend continuation): flip every rule. Price below a down-sloping 20 EMA, rally into the EMA, enter on a 1-hour close back below it, stop 90 pips above, target 150 pips below.
Gold is trending up and trades at $4,050, well above a rising 20 EMA. Over the next few hours it drifts down to $4,032, tapping the EMA, then prints a 1-hour candle that closes at $4,035, back above the average.
You enter long at $4,035. Stop goes at $4,026 (90 pips, just under the swing low). Target is $4,050 (150 pips). If the trend resumes and price tags $4,050, you make $15.00 per ounce against $9.00 risked.
At 1.67 R:R you do not need to be right most of the time. Risk $9.00 to make $15.00 and six winners return $900 on a $1,500 stake, while four losers cost $360, so you come out ahead even losing four trades out of ten. That math only holds if you take the entries the rules define and skip the ones they do not, because the discipline to wait for the pullback rather than chase the move is what keeps your average winner larger than your average loser.
A few practical notes. Skip the trade if price is chopping sideways across the EMA with no clear slope, because the moving average only works as support or resistance when there is a real trend behind it. The 90-pip stop and 150-pip target are starting points: on quiet days gold may not travel 150 pips, and on high-volatility days an event can blow through a 90-pip stop in seconds. Size your position so a full 90-pip loss is money you accept losing, and remember that leverage up to 1:500 on XAUUSD cuts both ways. CFDs carry a real risk of loss, and no setup wins every time.
Gold does not trend all day. During the quiet stretch between the New York close and the London open, XAUUSD often coils inside a tight band with no real direction. This is the dead zone, and it is where breakout strategies get chopped to pieces. The fix is to flip the logic: instead of buying strength, you fade the edges of the range and aim for the middle.
This setup works when gold is range-bound, not trending. Before you take it, confirm you are in a range, not a trend.
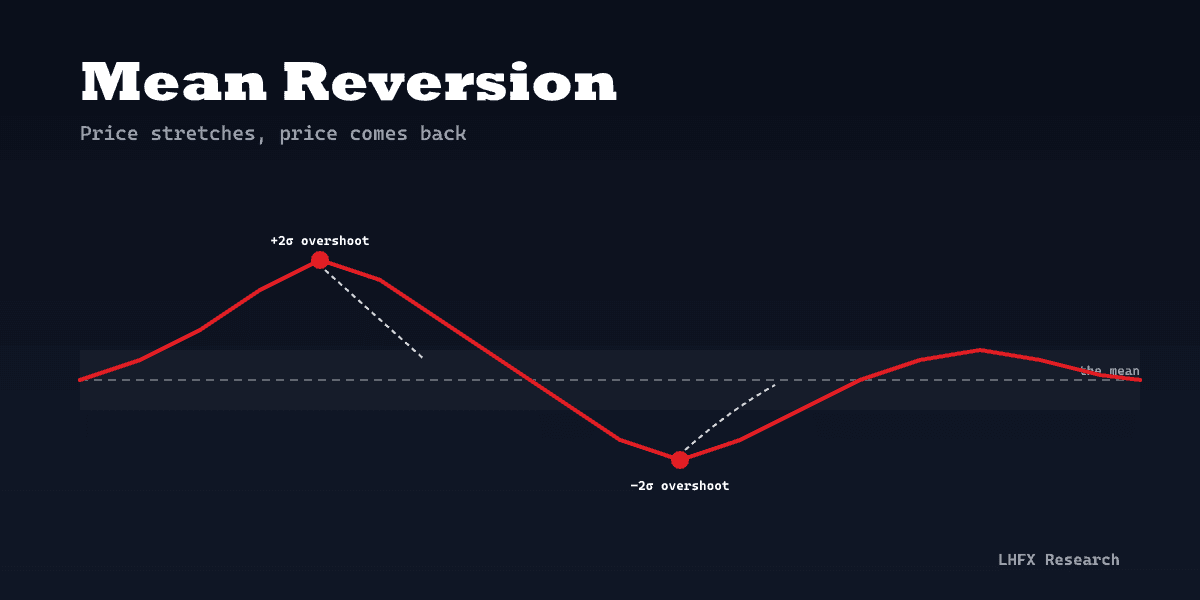
The trade you are looking for is mean-reversion: price stretches to an extreme, runs out of buyers or sellers, and snaps back toward the average. You are not predicting a reversal of the bigger picture. You are harvesting the rubber-band move inside a balanced market.
Say gold has spent the Asian session bouncing between 4005.00 on the low side and 4017.50 on the high side. Price grinds back up to 4017.50 for the third time and prints a clear rejection wick.
Even if price only reaches the midpoint and then breaks back out against you, the math still works in your favour over a sample of trades, because your downside is capped at 18 pips while a clean run to the far side pays 130. That asymmetry is the whole point of fading extremes inside a defined range.
Ranges break. The single biggest mistake with this setup is fading a boundary that is actually the start of a breakout. Two defences: never run it into scheduled news, and respect the stop without hesitation. If 4019.30 trades, the range is gone and your reason for being short is gone with it. Trading XAUUSD on leverage means a few range breaks in a row can erase a string of winners, so size each trade off the 18-pip stop, not off the account balance.
Gold reprices fast around scheduled data. US CPI, the FOMC rate decision, and Non-Farm Payrolls are the big three, because they move expectations for real interest rates and the dollar, the two forces that drive XAUUSD more than anything else. A hotter-than-expected CPI print lifts rate expectations, pushes the dollar up, and pressures gold. A soft print does the reverse. The move often comes in seconds, and the spread widens while it happens.
This is the most aggressive setup in this guide, and it is not for beginners. You are trading a volatility expansion, not a clean technical level. Size down, accept that slippage is part of the cost, and never risk more than you would on a normal trade just because the candle is bigger.
Say CPI prints hot. The first one-minute candle after the release runs from 4,048.00 down to 4,036.00, a 12 dollar range. It closes near the lows. You sell the break of 4,036.00 with your stop back above the candle high at 4,048.00.
That stop is 12 dollars of price, which is 120 pips at the master scale of $0.10 per pip. You set your target 25 dollars below entry, at roughly 4,011.00, for about 250 pips of reward. That is a reward-to-risk of about 1:2.08 on the trade.
On one standard lot, where a one dollar move in gold is worth $100, the 12 dollar stop is $1,200 of risk and the 25 dollar target is $2,500 of reward. Those numbers are why position sizing matters here more than anywhere else. A full lot on a news trade is a large position for most accounts. If $1,200 is more than the 1 to 2 percent of your balance you are willing to lose on one idea, trade a smaller lot size, not a wider stop.
The edge in this playbook is patience and execution, not prediction. Most losers come from jumping in before the first candle closes, chasing a fill into a widening spread, or moving the stop when the retest scares them. Trade it on a demo until the mechanics are automatic. Gold around CPI can hand you a fast win and an equally fast loss, and CFDs carry a real risk of loss, so the discipline to stand aside on a bad spread is as much a part of the strategy as the entry itself.
The four setups above only work if you survive long enough to let your edge play out. Gold moves fast, and a single oversized position can erase weeks of disciplined trades. These are the rules that keep you in the game.
Decide what percentage of your account you are willing to lose on any single trade before you place it. For most traders that number sits between 0.5% and 2%. Risk the same percentage every time, so your position size scales with your balance instead of your emotions.
Here is why the percentage matters more than it looks. Losing streaks are not rare, they are guaranteed. Plan for them.
Run the same 10 consecutive losses at different risk levels:
The deeper the drawdown, the more disproportionate the recovery. A 40% loss does not need a 40% win to undo it, it needs 67%, because you are now earning that return on a much smaller balance. Keeping risk small keeps the recovery math on your side.
Position sizing on gold is simple once you lock in the units. The convention used throughout this guide:
To size a trade, work backwards from your stop:
That is the position that risks exactly 1% if the stop is hit. Widen the stop and the lot size shrinks. Tighten it and the lot size grows. The dollar risk stays fixed, which is the whole point.
LHFX offers leverage up to 1:500 on XAUUSD. That figure tells you the maximum position the margin allows, not the position you should take. Leverage does not change your risk, your stop distance and lot size do. A trader using 0.05 lots on a $2,000 account is running the same risk whether the account allows 1:100 or 1:500.
Use leverage to free up margin so you are not forced to close good trades for capital reasons. Do not use it as a reason to size up. The position size comes from the math above, full stop.
Every one of the four setups specifies an entry, a stop, and a target before the trade is live. That order is deliberate. If you cannot state where you are wrong, you have no business stating where you are right. Set the stop at the level that invalidates your idea, size the position to your fixed risk percentage, and let the trade run to its target or its stop without renegotiating in the moment.
CFDs on gold carry a real risk of loss, and leverage works in both directions. These rules do not remove that risk. They keep any single loss small enough that the next setup, and the one after, still has a chance to work.
The setups above only work if you stop sabotaging them. Most blown gold accounts trace back to a handful of repeatable errors, not to bad strategies. Here are the ones that cost traders the most, and the exact fix for each.
This is the most expensive mistake, and it comes from carrying EURUSD habits onto XAUUSD without re-checking the math. On EURUSD, a 1-pip move on a 1.00-lot position is worth roughly $10, and a 20-pip stop feels small. On gold, a pip is $0.10 per 0.01 lot, so $1.00 of price movement equals 10 pips. A normal gold stop is not 20 pips, it is often $5 to $15 of price, which is 50 to 150 pips. Drop a forex-sized lot onto that stop and a single trade can risk a multiple of what you intended.
The fix: size every gold trade from the dollar distance to your stop, not from a pip count you remember from forex. Decide the cash you are willing to lose, measure the stop in dollars of XAUUSD movement, then back out the lot size. If you are risking $50 and your stop is $10 wide, that is 100 pips, and you work the lot size down until 100 pips equals $50. Run the number before every entry until it is second nature.
Gold is quiet during the late North American afternoon and the early Asian session, then comes alive around the London open and through the London and New York overlap. In SAST that overlap lands in the afternoon, which is when the session-breakout and trend-continuation setups have the cleanest follow-through. Forcing trades into thin hours gives you wider spreads, slower fills, and false breaks that reverse the moment real volume arrives.
The fix: match each setup to its session. Take breakouts and trend continuations during active hours, and treat dead hours as time to plan, not to trade.
Gold is not a chart in a vacuum. It moves on real interest rates, the dollar (DXY), central bank activity, and risk sentiment. Trade a clean long technical setup straight into a hot inflation print or a hawkish rate decision and the fundamentals can run you over regardless of how good the chart looked.
The fix: check the economic calendar before every session. Know when CPI, rate decisions, and major data land, and either stand aside through the release or trade it deliberately with the news playbook rather than getting caught flat-footed.
When price drifts toward your stop, the temptation is to widen it "just a little" to give the trade room. That converts a planned, sized loss into an open-ended one, and it is how a 1R loss becomes a 4R loss. The stop is where your idea was wrong. If price gets there, the idea was wrong.
The fix: set the stop at entry, size the position to that stop, and never move it further from price. You can trail it in your favour, never against you.
A stopped-out trade is not a reason to immediately re-enter and "win it back." Revenge trades skip the setup checklist, ignore the session, and usually size up, which is exactly the combination that compounds a bad day into a bad week.
The fix: predefine a daily loss limit, for example two losing trades or a fixed percentage of the account, and stop for the day once you hit it. The market is open tomorrow.
A brief risk note: every setup here is rule-based, but none of it removes risk. CFDs on gold carry a real risk of loss, leverage works in both directions, and no strategy guarantees a profit. These setups are educational, not a promise of returns. Trade them on a small account or in a controlled way until the rules are second nature.
The setups above only work if your execution and costs match the plan. A pullback strategy that risks 30 pips to make 60 falls apart fast if your spread eats 8 pips on entry and your fills slip. So the broker mechanics matter as much as the rules.
LHFX runs STP/ECN execution on MetaTrader 5. Your XAUUSD orders route straight through to market pricing, not against an in-house book. You trade gold on raw spreads from tight levels, with commission charged separately so the cost is transparent: $3 per side, which is $6 round turn per lot. You see the spread and the commission as two clear numbers instead of a single padded price.
Here is what that means for the worked examples. Take the session-breakout setup clearing 15 to 30 pips. On a raw-spread account the price you act on is close to the real market, so a 20-pip target nets 16 pips after a typical spread and commission, instead of being chewed down by a wide markup. The tighter your effective cost, the more of those rule-based setups stay profitable on paper and in practice.
Sizing fits the same math from the position sizing section above. Leverage on gold goes up to 1:500, so the margin to hold a position is small relative to its notional value. That cuts both ways: 1:500 lets a modest balance control a full lot, and it magnifies losses just as fast as gains. Size off your stop distance and risk per trade, never off the maximum lot the leverage allows.
You can fund and start with a $10 minimum deposit, which is enough to trade micro lots and test these setups with real fills before you scale. New to the symbol? Read the what is XAUUSD explainer, work through the pip value guide, paper-trade the rules, then commit small.
One honest note: gold moves fast, and CFDs carry a real risk of loss. Tight costs and clean execution improve your odds on a sound strategy, they do not remove the risk. None of these setups guarantees a profit. Trade with money you can afford to lose, keep your risk per trade fixed, and let the rules, not the news ticker, decide your entries and exits.
There is no single best one. For beginners the pullback-to-moving-average trend continuation strategy is usually the easiest to follow because it trades with gold's strong trends rather than against them, and it has clear entry, stop and target rules. Start on a higher timeframe, risk a small fixed percentage per trade, and trade one strategy long enough to judge it.
You trade gold as the XAUUSD CFD: you are speculating on the dollar price of one ounce of gold, going long if you expect it to rise and short if you expect it to fall. On LHFX you open an XAUUSD chart in MetaTrader 5, set your lot size based on your risk, place a stop and target, and execute. No physical gold changes hands.
In this guide a pip in XAUUSD is a $0.10 move in the gold price (gold is quoted to two decimals, so 4018.50 to 4018.60 is one pip). The dollar value depends on your lot size: $10 per 1.00 standard lot, $1 per 0.10 lot, and $0.10 per 0.01 lot. Terminology varies between platforms, so confirm the exact pip or point value on your account before sizing a trade.
One standard lot of XAUUSD is 100 ounces of gold. A 0.10 lot is 10 ounces and a 0.01 micro lot is 1 ounce. With leverage up to 1:500 on gold at LHFX, the margin needed to control a lot is a small fraction of its full notional value, but your risk is based on the full position size, so size to your stop.
Gold is most active during the London and New York session overlap, when liquidity and volatility are highest. The Asian session is usually quieter and better suited to range setups. Time your session-breakout trades to the overlap and check the economic calendar, since US data releases drive the biggest moves.
The main drivers are real interest rates, the US dollar and the dollar index, central bank policy and rate decisions, and risk sentiment. Gold pays no yield, so it tends to fall when real rates rise and rise when they fall. It often moves inverse to the dollar and can spike on safe-haven demand during risk events.
Yes. Gold can move fast and wide, and trading it as a leveraged CFD means losses as well as gains are amplified. CFDs carry a real risk of loss and no strategy guarantees a profit. Manage risk with a fixed percentage per trade, always use a stop sized to gold's volatility, and avoid running tight-stop setups into high-impact news.